Learning how to run ethernet cable through walls is one of the best upgrades you can make to a home network. A properly installed wired run eliminates Wi-Fi dead zones, reduces latency, and delivers consistent gigabit speeds to any room. This guide walks through every step from planning the route to testing the finished run.
This article is part of the complete Home Networking Guide — a single reference covering cables, hardware, IP addresses, and troubleshooting for home networks.
What You Need to Run Ethernet Cable Through Walls
To complete how to run ethernet cable through walls correctly, gather everything on this list before you start stopping mid-job to source a tool wastes time and risks leaving holes open.
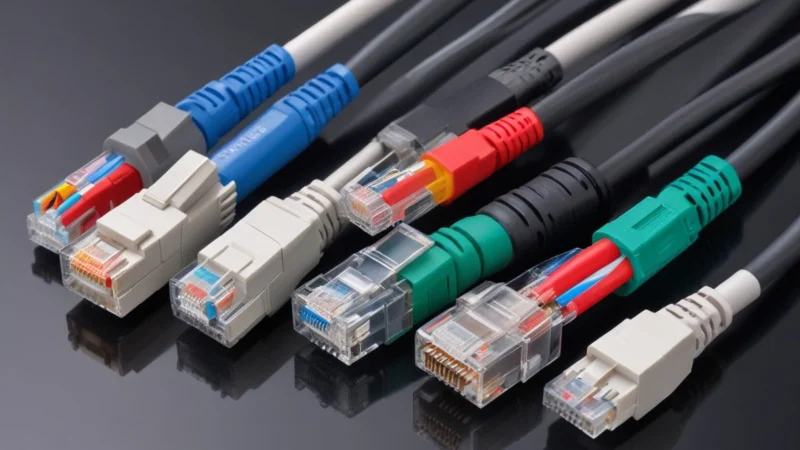
- Cat6 Ethernet cable — supports 10 Gbps, the current standard for new installations
- Fish tape or fish sticks — for guiding cable through wall cavities
- Power drill with a long flexible drill bit (12–18 inches minimum)
- Stud finder with AC wire detection
- Low-voltage mounting brackets and wall plates
- RJ-45 keystone jacks and punch-down tool
- Cable tester — verify before closing walls
Step 1: Plan Your Route
Before you run ethernet cable through walls, map the full path from router to destination. Knowing how to run ethernet cable through walls starts with planning a good route saves hours of troubleshooting later. The cleanest routes go through interior walls or follow the path down to a basement or up through an attic both avoid drilling through multiple floors.
Avoid:
- Exterior walls insulation blocks fish tape
- Walls with plumbing or electrical wiring
- Fire blocks horizontal 2×4 boards that stop vertical cable runs
Step 2: Locate Studs and Mark Outlet Positions
Studs are typically 16 or 24 inches apart. Mark them so you know where to drill between them. Standard outlet height for data is 12–18 inches from the floor, aligned with existing outlets for a consistent look.
Step 3: Drill Entry and Exit Holes
At each outlet location, drill a hole for a low-voltage mounting bracket typically 1.5 inches using a hole saw. For vertical runs between floors, drill through the top or bottom plate of the wall cavity from the attic or basement using a long flexible bit. Drill slowly and watch for resistance that signals a fire block.
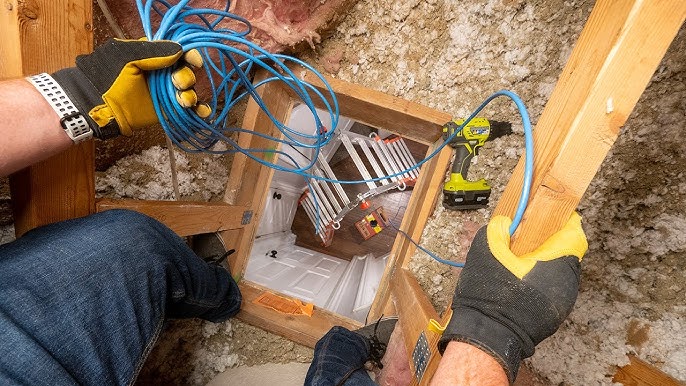
Step 4: Fish the Cable
Attach the ethernet cable to fish tape with electrical tape wrap tightly to create a smooth nose that slides through the cavity. Push from one hole toward the other. For vertical runs, drop a weighted string first to confirm the path is clear. Leave 12–18 inches of slack at each end before cutting.
Step 5: Terminate the Connectors
Terminate each end into a keystone jack using a punch-down tool, following the T568B wiring standard at both ends. Snap the keystone into the wall plate and mount the bracket. For a direct connection, crimp RJ-45 plugs instead. For wiring reference: T568A vs T568B Wiring Standards.
Step 6: Test Before Closing the Wall
Before patching holes or mounting plates permanently, test with a cable tester. All 8 LEDs should light in sequence. A fault now takes 5 minutes to fix the same fault after closing the wall costs hours. See: How to Test an Ethernet Cable.
How to Run Ethernet Cable Through Walls Between Floors
Knowing how to run ethernet cable through walls between floors is the hardest part of any home network project. Running ethernet cable through walls between floors adds the challenge of horizontal framing plates. The most reliable approach:
- Access the attic or basement to find where the wall cavity sits above or below the target outlet
- Drill through the top plate (from attic) or bottom plate (from basement) with a long flexible bit
- Drop a weighted pull string to confirm the path, then attach the ethernet cable and pull through
Attic access makes this much easier you can work from above and see exactly where the cable drops. For cable choice: Cat5e vs Cat6: Which Should You Use?
How to Run Ethernet Cable Through Walls: Tips for a Clean Install
- Buy 20% more cable than your measured run obstacles add distance
- Label each cable end before fishing
- Use Cat6 for all new permanent runs. See: Network Cable Types Compared
- Avoid sharp bends minimum bend radius is ~1 inch; tight kinks damage the wire pairs
- Consider PVC conduit for planned installations lets you pull replacement cable in the future without reopening walls
The TIA-568 cabling standard defines best practices used by professional installers for permanent ethernet runs.
Alternatives When You Cannot Run Ethernet Cable Through Walls
- Cable raceways: Surface-mounted channels along baseboards fast, renter-friendly
- MoCA adapters: Use existing coaxial cable to carry Ethernet signals near-gigabit performance
- Powerline adapters: Use electrical wiring convenient but variable performance
Frequently Asked Questions
- How long does it take to run ethernet cable through walls?
- A single run of ethernet cable through walls in the same room takes 1–2 hours including drilling, fishing, and terminating. Between-floor runs take 3–4 hours if fire blocks require extra drilling.
- What is the best cable to use when you run ethernet cable through walls?
- Cat6 is the recommended choice for anyone learning how to run ethernet cable through walls permanently. Use plenum-rated (CMP) cable if the run passes through air-handling spaces standard PVC jacket is a fire code violation in those areas.
- Do I need a permit to run ethernet cable through walls?
- In most jurisdictions, how to run ethernet cable through walls for residential use does not require a permit. Check local codes for commercial buildings or conduit installations.
Final Thoughts
Once you know how to run ethernet cable through walls, the process becomes repeatable for any room in the house. The tools are inexpensive, the steps are straightforward, and the result a reliable gigabit connection lasts for years. Whether you are running a single drop or wiring an entire floor, the same principles apply: plan the route, drill clean holes, fish carefully, and test before closing anything up.
If you are still deciding whether the project is worth it, remember that knowing how to run ethernet cable through walls gives you a permanent upgrade that no Wi-Fi extender can match.