A network can fail for dozens of reasons, but one of the most common is surprisingly simple: DHCP is disabled, misconfigured, or unable to assign addresses to devices. When that happens, computers, phones, printers, and smart TVs cannot obtain the information they need to communicate with the router or access the internet.
If you’re searching for how to enable DHCP on router settings because devices suddenly lost connectivity, display a 169.254.x.x address, or show messages such as “DHCP is not enabled” or “Unable to obtain IP address”, the solution is usually found inside the router’s local network configuration.
The good news is that learning how to enable DHCP on router settings takes only a few minutes. Once DHCP is working correctly, devices automatically receive an IP address, subnet mask, gateway, and DNS settings without requiring manual configuration.
What Is DHCP and Why Is It Important?
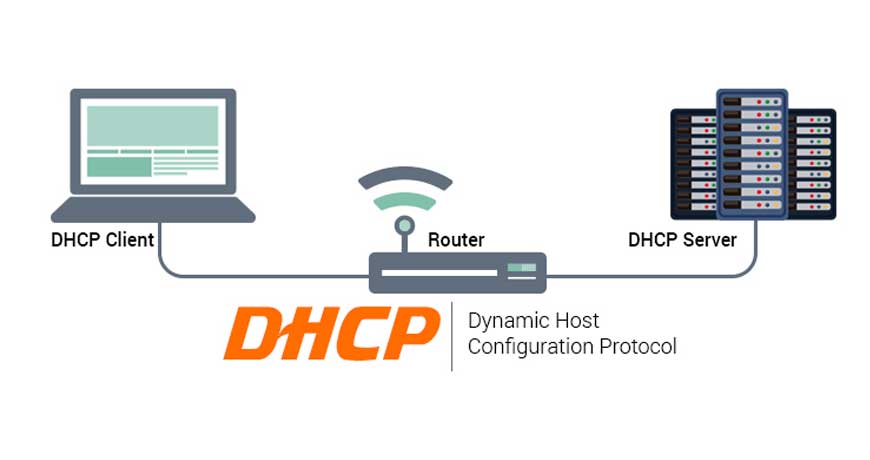
DHCP, short for Dynamic Host Configuration Protocol, automates the assignment of network settings to connected devices.
Without DHCP, every device would require manual configuration. That might be manageable on a network with one or two devices, but it quickly becomes impractical when dozens of phones, laptops, gaming consoles, cameras, printers, and smart home devices are involved.
| When DHCP Works | When DHCP Fails |
|---|---|
| Devices receive IP addresses automatically | Devices receive APIPA addresses (169.254.x.x) |
| Internet access works normally | No internet connectivity |
| DNS settings are assigned automatically | Websites fail to resolve |
| Network management is simplified | Manual troubleshooting becomes necessary |
A properly configured DHCP server operates silently in the background. Most users never notice it until something goes wrong.
How to Enable DHCP on Router in 3 Simple Steps
The process of how to enable DHCP on router interfaces is remarkably similar across TP-Link, ASUS, Netgear, Linksys, D-Link, Huawei, and most ISP-provided routers.
Step 1: Access the Router Administration Page
To begin how to enable DHCP on router settings, open a web browser on a device connected to the network.
Enter the router’s management IP address into the address bar.
The most common addresses are:
| Common Router IP Addresses |
|---|
| 192.168.1.1 |
| 192.168.0.1 |
| 10.0.0.1 |
| 192.168.100.1 |
If none of these work, check the sticker on the router, the user manual, or the gateway address shown by your operating system.
After reaching the login page, sign in using administrator credentials. Many routers use customized credentials provided by the ISP, while others allow users to set their own during initial setup.
Once logged in, navigate to the network configuration section.
Step 2: Enable the DHCP Server
The next stage of how to enable DHCP on router configuration is locating the DHCP service itself.
Depending on the manufacturer, DHCP settings are commonly found under:
| Possible Menu Locations |
|---|
| LAN Settings |
| Local Network |
| Home Network |
| Network Configuration |
| Advanced Network |
| DHCP Server |
Look for a setting labeled DHCP Server.
If the status is set to Disabled, change it to Enabled.
You should also verify the DHCP address pool.
A typical home configuration might look like this:
| Setting | Example |
|---|---|
| Router Address | 192.168.1.1 |
| DHCP Start Address | 192.168.1.100 |
| DHCP End Address | 192.168.1.200 |
| Lease Time | 24 Hours |
Most documentation covering how to enable DHCP on router settings recommends using a pool that leaves space for devices requiring static IP addresses, such as printers, access points, servers, or network storage devices.
Step 3: Save Changes and Renew IP Addresses
After completing how to enable DHCP on router settings, save the configuration and reboot the router if required.
Many routers apply changes immediately, but some only activate DHCP modifications after a restart.
On Windows systems, renewing the DHCP lease can speed up recovery:
ipconfig /release
ipconfig /renew
To verify that the device received a valid address:
ipconfig /allA properly functioning DHCP server should assign an address within the configured subnet instead of a self-assigned APIPA address.
Understanding the Most Common DHCP Problems
Even after learning how to enable DHCP on router settings, some networks continue experiencing address assignment issues.
The underlying cause is usually one of several common configuration mistakes.
| Problem | Likely Cause | Recommended Fix |
|---|---|---|
| 169.254.x.x address | DHCP server unreachable | Verify DHCP is enabled |
| No valid IP configuration | DHCP service disabled | Enable DHCP server |
| Intermittent connectivity | IP conflicts | Review static addresses |
| New devices cannot connect | DHCP pool exhausted | Expand available range |
| Entire network offline | Router DHCP failure | Reboot router |
These issues account for the majority of residential DHCP-related support requests.
Multiple DHCP Servers Can Break a Network
One frequently overlooked problem involves multiple DHCP servers operating simultaneously.
For example, a second router may have been connected to the network and left in router mode instead of access point mode. Both devices begin assigning addresses independently, creating conflicts and unpredictable behavior.
Understanding how to enable DHCP on router settings also means understanding when DHCP should be disabled.
In most home networks, only one DHCP server should exist. Typically, this is the primary router connected directly to the internet service provider.
Secondary routers functioning as access points generally should not provide DHCP services.
Verify Devices Are Configured for Automatic Addressing
Sometimes the router is working correctly and the problem exists on the client device.
Windows users should verify that IPv4 settings are configured to obtain addresses automatically.
Navigate to:
Control Panel → Network and Sharing Center → Change Adapter Settings
Open the properties of the active network adapter and confirm that both settings are configured automatically:
| Required Setting |
|---|
| Obtain IP address automatically |
| Obtain DNS server address automatically |
If manual addressing is enabled, DHCP requests may never occur.
This is another situation where users searching for how to enable DHCP on router settings often discover the router was never the actual problem.
Additional Windows Networking Repairs
Corrupted networking components can prevent communication with DHCP servers.
Windows includes built-in repair commands capable of resetting the TCP/IP stack and Winsock configuration.
netsh int ip reset
netsh winsock reset
ipconfig /flushdns
After rebooting the computer, the system will rebuild networking components and request a fresh DHCP lease.
You can also confirm that the DHCP Client service is running by opening:
services.mscLocate DHCP Client and verify that the service is active.
Router Brand Locations for DHCP Settings
Although interfaces differ, the process behind how to enable DHCP on router settings remains almost identical across major brands.
| Router Brand | DHCP Location |
|---|---|
| TP-Link | Network → LAN → DHCP Server |
| ASUS | LAN → DHCP Server |
| Netgear | Advanced → Setup → LAN Setup |
| Linksys | Connectivity → Local Network |
| D-Link | Network Settings → DHCP Server |
| Huawei | LAN Settings → DHCP Configuration |
Modern firmware versions may alter menu names slightly, but DHCP remains part of the local network configuration.
How to Enable DHCP on Router Devices Running Cisco IOS
Enterprise administrators approaching how to enable DHCP on router deployments often work with Cisco hardware rather than graphical web interfaces.
Cisco routers use command-line configuration.
A basic DHCP deployment looks like this:
service dhcp

ip dhcp excluded-address 192.168.1.1 192.168.1.50

ip dhcp pool OFFICE
 network 192.168.1.0 255.255.255.0
 default-router 192.168.1.1
 dns-server 8.8.8.8
 lease 1
This configuration reserves addresses, creates a pool, specifies the subnet, defines the gateway, and assigns DNS servers.
Enterprise networks frequently build more advanced configurations, but the underlying principles remain identical.
When a Factory Reset Is the Best Solution
There are situations where every attempt to fix DHCP fails despite correct configuration.
If you have already verified how to enable DHCP on router settings, confirmed firmware updates, removed duplicate DHCP servers, and expanded the DHCP pool, configuration corruption may be responsible.
A factory reset can often restore normal operation faster than prolonged troubleshooting.
Most routers can be reset by holding the reset button for approximately 10 to 15 seconds while powered on.
After rebooting, DHCP is generally enabled by default and the router can be configured from scratch.
Conclusion
Knowing how to enable DHCP on router settings is one of the most valuable networking skills for home users, small businesses, and IT professionals. DHCP controls the automatic distribution of IP addresses and critical network information, making it essential for reliable connectivity.
In most cases, the solution involves accessing the router interface, enabling the DHCP server, configuring a sensible address range, saving the settings, and renewing client leases. When problems continue, checking for multiple DHCP servers, exhausted address pools, incorrect static IP assignments, or client-side configuration issues usually reveals the cause.
Once you understand how to enable DHCP on router configurations correctly, devices can join the network automatically, receive valid addresses immediately, and maintain stable internet access without manual intervention.